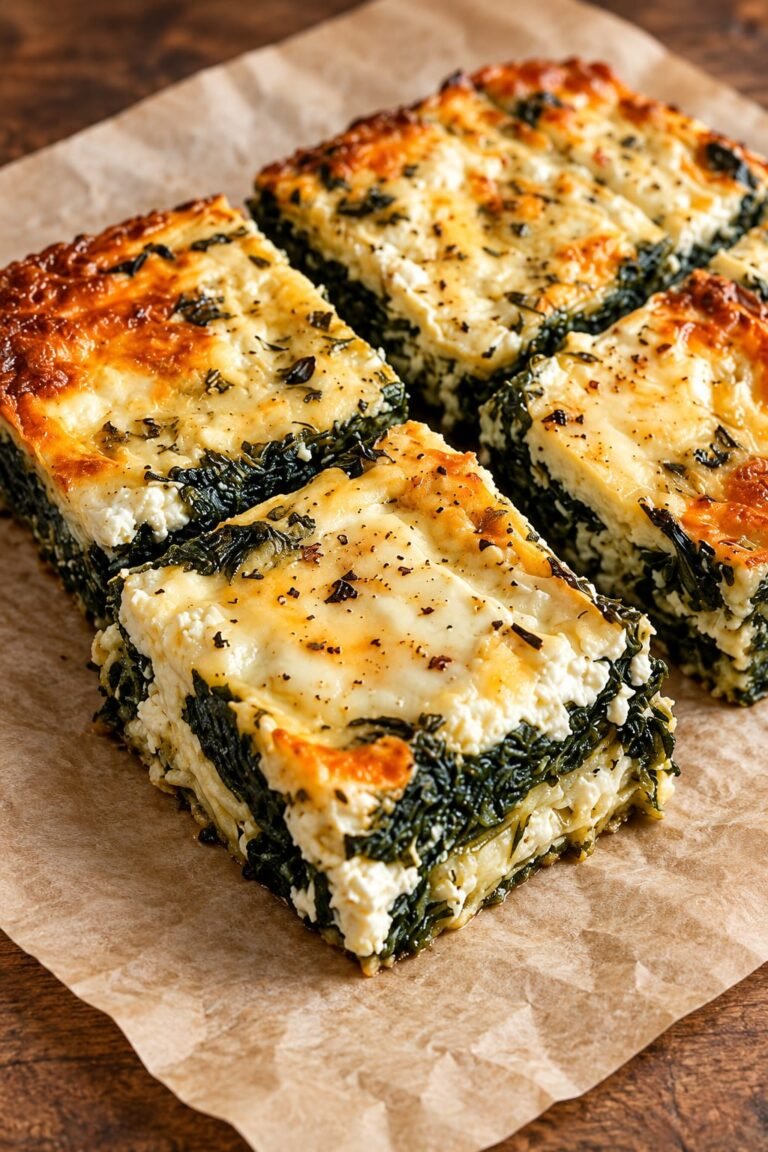
Baked Spinach Mushroom Quesadillas
Crispy, Cheesy, and Packed with Flavour!
Description
These baked spinach mushroom quesadillas are a delicious, easy-to-make meal filled with tender sautéed mushrooms, fresh spinach, garlic, and plenty of melted mozzarella and cheddar cheese. Baked in the oven until golden and crispy, they deliver all the comforting flavours of traditional quesadillas without requiring you to stand over a skillet cooking each one individually.
The combination of earthy mushrooms, tender spinach, sweet onion, and fragrant garlic creates a savoury filling that tastes wonderful with the creamy, melted cheese. The tortillas become lightly crisp on the outside while remaining soft enough to hold the flavourful filling together.
This recipe is perfect for busy weeknights, quick lunches, meatless dinners, or a satisfying afternoon snack. It is also a fantastic way to add more vegetables to your meals without sacrificing flavour. Even people who are not big fans of spinach may enjoy it when combined with mushrooms, garlic, and cheese.
Because the quesadillas are baked together on a sheet pan, preparation is simple, cleanup is easy, and you can make several servings at once. Serve them with salsa, guacamole, sour cream, or a fresh salad for a complete and satisfying meal.
If you love quick, cheesy, and comforting recipes, these Baked Spinach Mushroom Quesadillas are sure to become a favourite in your kitchen!
Recipe Details
-
Preparation Time: 15 minutes
-
Cooking Time: 15–20 minutes
-
Total Time: Approximately 35 minutes
-
Servings: 4 quesadillas
-
Course: Lunch, Dinner, or Snack
-
Cuisine: Mexican-inspired
-
Cooking Method: Baking
-
Difficulty: Easy
Ingredients
For the quesadillas
-
4 medium flour tortillas, approximately 8 inches each
-
1 cup shredded mozzarella cheese
-
1 cup shredded cheddar cheese
-
2 cups fresh spinach, chopped
-
1½ cups mushrooms, sliced
-
1 small onion, diced (optional)
-
2 cloves garlic, minced
-
1 tablespoon olive oil
-
1 tablespoon butter
-
½ teaspoon salt, or to taste
-
¼ teaspoon black pepper
-
¼ teaspoon garlic powder
-
Cooking spray or extra olive oil for brushing
Optional Serving Suggestions
-
Fresh salsa
-
Guacamole
-
Sour cream or plain Greek yoghurt
-
Chopped fresh cilantro
-
Red pepper flakes
-
Fresh lime wedges
Instructions
Step 1: Preheat the Oven
Preheat your oven to 400°F (200°C). Prepare a large baking sheet by lightly coating it with cooking spray or lining it with parchment paper.
Preheating the oven helps the tortillas crisp evenly and allows the cheese to melt while the outside becomes beautifully golden.
For extra crispiness, place the empty baking sheet in the oven while it preheats. Carefully remove it when you are ready to arrange the quesadillas.
Step 2: Prepare the Vegetables
Wash the fresh spinach and dry it thoroughly. Chop it into small pieces so it distributes evenly throughout the filling.
Clean the mushrooms with a damp paper towel or rinse them briefly and dry them well. Slice them thinly for quicker, more even cooking.
Dice the onion, if using, and mince the garlic.
Preparing all the vegetables before cooking makes the process easier and helps prevent the garlic from burning while you are chopping other ingredients.
Step 3: Sauté the Mushrooms and Onion
Heat the olive oil and butter in a large skillet over medium heat.
Add the sliced mushrooms and diced onion. Cook for approximately 5–7 minutes, stirring occasionally, until the mushrooms release their moisture and begin to turn golden brown.
Allow excess moisture to evaporate before moving to the next step. This is important because watery vegetables can make the tortillas soggy during baking.
If you are using a smaller skillet, cook the mushrooms in batches rather than overcrowding the pan.
Step 4: Add the Garlic and Spinach
Add the minced garlic to the skillet and cook for approximately 30 seconds, stirring constantly until fragrant.
Add the chopped spinach and cook for another 1–2 minutes, just until wilted.
Season the mixture with salt, black pepper, and garlic powder. Stir thoroughly so the seasoning coats the vegetables evenly.
Remove the skillet from the heat and allow the filling to cool for a few minutes.
If you notice liquid collecting at the bottom of the skillet, drain it before assembling the quesadillas. A relatively dry filling helps create a crispier result.
Step 5: Combine the Cheeses
In a medium bowl, combine the shredded mozzarella and cheddar cheese.
Mozzarella provides a stretchy, gooey texture, while cheddar adds a richer, sharper flavour. Together, they create a delicious cheese filling that complements the mushrooms and spinach.
For the best melting results, shred cheese from a block if possible. Pre-shredded cheese is convenient, but its added anti-caking ingredients can sometimes affect how smoothly it melts.
Step 6: Assemble the Quesadillas
Lay the four tortillas on a clean work surface.
Sprinkle a small amount of the cheese mixture over one half of each tortilla. Divide the sautéed spinach and mushroom filling evenly among the tortillas.
Add another layer of cheese over the vegetables. The cheese helps bind the filling together and keeps it from falling out when you cut the quesadillas.
Fold each tortilla in half to create a semicircle. Press gently to secure the filling without squeezing it out.
Avoid overfilling the tortillas. A moderate amount of filling makes them easier to fold, bake, and serve.
Step 7: Arrange on the Baking Sheet
Place the folded quesadillas on the prepared baking sheet in a single layer.
Lightly brush the tops with olive oil or coat them with cooking spray. This helps the tortillas turn golden and crisp in the oven.
Leave a little space between each quesadilla so hot air can circulate around them.
For extra browning, you can place another clean baking sheet on top for the first few minutes of baking, but this is optional.
Step 8: Bake Until Golden and Crispy
Bake the quesadillas for 8–10 minutes.
Carefully flip each quesadilla using a wide spatula, then bake for another 5–8 minutes, or until both sides are lightly golden and crispy and the cheese has melted.
Oven temperatures and tortilla thickness can vary, so begin checking them toward the earlier end of the cooking time.
If you want a deeper golden finish, broil them briefly at the end. Watch them closely because tortillas can brown very quickly under a broiler.
Step 9: Rest and Slice
Remove the baking sheet from the oven and allow the quesadillas to rest for 2–3 minutes.
This short resting period allows the melted cheese to settle slightly, making the quesadillas easier to cut without losing their filling.
Use a sharp knife or pizza cutter to slice each quesadilla into two or three wedges.
Step 10: Serve and Enjoy
Arrange the warm quesadillas on a serving platter and garnish with chopped cilantro or a light sprinkle of red pepper flakes, if desired.
Serve immediately with salsa, guacamole, sour cream, or plain Greek yoghurt.
For a more balanced meal, pair them with a crisp cucumber salad, tomato salad, roasted vegetables, or a bowl of vegetable soup.
Enjoy every crispy, cheesy bite!
Notes
1. Choose the Right Mushrooms
Cremini, white button, or baby bella mushrooms all work well. Cremini mushrooms have a slightly deeper, earthier flavour, while white button mushrooms provide a mild taste.
2. Remove Excess Moisture
Mushrooms and spinach naturally contain a lot of water. Cooking them until their moisture evaporates is one of the most important steps for avoiding soggy quesadillas.
3. Use Fresh or Frozen Spinach
Fresh spinach is ideal, but frozen spinach can also work. Thaw frozen spinach completely and squeeze out as much liquid as possible before adding it to the filling.
4. Adjust the Cheese
You can use all mozzarella, all cheddar, Monterey Jack, or a Mexican-style cheese blend. The flavour and texture will change slightly depending on your choice.
5. Make Them Vegetarian
The recipe is vegetarian as written, provided the cheeses you use are suitable for a vegetarian diet. Check the cheese label if you avoid animal-derived rennet.
6. Choose Your Tortillas
Regular flour tortillas are flexible and easy to fold. Whole-wheat tortillas are another option and add more fibre, depending on the brand.
7. Keep the Filling Dry
Avoid adding the vegetables while they are steaming hot or watery. Let them cool briefly and drain any excess liquid before assembling.
Tips for Perfect Baked Quesadillas
-
Do not overfill: Too much filling can cause the tortillas to open during baking.
-
Use a hot oven: Baking at 400°F helps the tortillas crisp without requiring deep frying.
-
Flip halfway through: Turning the quesadillas helps both sides become evenly golden.
-
Use enough cheese: Cheese acts as a binder and helps hold the vegetables inside.
-
Avoid excess oil: A light coating is usually enough to encourage browning.
-
Cut after resting: Waiting a couple of minutes helps keep the filling in place.
-
Customise the flavour: Add smoked paprika, cumin, chilli powder, or red pepper flakes for extra flavour.
-
Add protein if desired: Cooked chicken, black beans, or seasoned tofu can make the quesadillas more filling.
-
Serve immediately: They taste best when the tortillas are crisp and the cheese is still warm and melted.
Servings
This recipe makes 4 medium quesadillas, serving approximately 4 people when each person has one quesadilla.
For a light lunch or snack, one quesadilla per person may be sufficient. For a larger meal, serve two wedges with a generous salad or vegetable side.
If you are cooking for a crowd, you can double the ingredients and bake the quesadillas on two separate baking sheets. Rotate the sheets between oven racks halfway through cooking to encourage even browning.
Nutritional Information
The following values are estimates for one whole quesadilla, assuming the recipe makes four quesadillas and uses standard flour tortillas, mozzarella, cheddar, butter, olive oil, and the listed vegetables.
-
Calories: 400–470
-
Protein: 17–22 g
-
Carbohydrates: 32–42 g
-
Dietary Fiber: 3–5 g
-
Total Fat: 22–29 g
-
Saturated Fat: 10–14 g
-
Sugar: 3–5 g
-
Sodium: 650–950 mg
Actual nutrition will depend on the tortilla brand, cheese quantities, added salt, and amount of oil absorbed during cooking. For more precise values, calculate the nutrition using the labels of your specific ingredients.
Benefits of Baked Spinach Mushroom Quesadillas
1. Provides Vegetables in a Delicious Way
Spinach and mushrooms add color, flavor, and important nutrients. Spinach contributes folate, vitamin K, and other nutrients, while mushrooms provide B vitamins and minerals.
2. Contains Protein and Calcium
Mozzarella and cheddar cheese provide protein and calcium, which help support normal muscle function and bone health as part of a balanced diet.
3. Offers a Satisfying Meatless Meal
The combination of vegetables, cheese, and tortillas creates a filling vegetarian meal. You can add beans or tofu if you want more plant-based protein.
4. Uses a Baking Method
Baking allows you to prepare the quesadillas with a relatively small amount of added oil compared with deep-frying. Brushing the tortillas lightly is usually enough to achieve a crispy exterior.
5. Easy to Customize
This recipe can accommodate different vegetables, cheeses, seasonings, and tortillas. It is a useful option for using up leftover mushrooms, spinach, or other vegetables in the refrigerator.
6. Convenient for Busy Days
The vegetable filling can be prepared ahead of time, making assembly quick when you are ready to eat. Baking several quesadillas together is also convenient for family lunches and casual dinners.
These benefits depend on the ingredients and portions you choose. The recipe is not a treatment for any medical condition, and its nutritional profile can vary considerably with different tortillas and cheese quantities.
Storage and Reheating
Refrigeration: Allow leftover quesadillas to cool, then place them in an airtight container and refrigerate within two hours of cooking. For best quality, eat them within 3–4 days.
Reheating in the oven: Place the quesadillas on a baking sheet and heat at 350°F (175°C) for approximately 8–12 minutes, or until heated through.
Reheating in an air fryer: Heat at 350°F (175°C) for approximately 3–5 minutes, checking frequently to prevent over-browning.
Reheating in a skillet: Warm over medium-low heat for a few minutes on each side until the cheese melts and the tortilla becomes crisp again.
Microwave: You can microwave leftovers for convenience, but the tortillas may become soft rather than crispy.
Freezing: For best texture, freeze the assembled quesadillas before baking, separated by parchment paper in a freezer-safe container. Bake from frozen at 400°F (200°C), allowing additional cooking time and checking that the filling is thoroughly heated. The texture of the vegetables may soften after freezing.
Frequently Asked Questions (Q&A)
Q1: Can I make Baked Spinach Mushroom Quesadillas ahead of time?
Yes! You can prepare the vegetable filling a day ahead and refrigerate it in an airtight container. When you are ready to eat, assemble the quesadillas and bake them fresh for the crispiest results.
Q2: Can I use frozen spinach instead of fresh spinach?
Absolutely. Thaw the frozen spinach and squeeze out as much liquid as possible before adding it to the skillet. This prevents excess moisture from making the tortillas soggy.
Q3: What mushrooms work best for this recipe?
White button and cremini mushrooms are excellent choices. Baby bella mushrooms provide a deeper flavor, but you can use whichever variety you prefer.
Q4: Can I make these quesadillas without butter?
Yes. Replace the butter with a little additional olive oil. The flavor will be slightly different, but the quesadillas will still be delicious.
Q5: How can I make the quesadillas spicier?
Add chili powder, cayenne pepper, sliced jalapeños, or red pepper flakes to the vegetable filling. You can also serve them with your favorite spicy salsa.
Q6: Can I add chicken to the filling?
Yes. Add cooked, shredded or diced chicken to the vegetable mixture before assembling the quesadillas. Make sure the chicken is fully cooked before adding it.
Q7: How do I prevent the quesadillas from becoming soggy?
Cook the mushrooms until their liquid evaporates, avoid adding wet vegetables, and squeeze excess moisture from frozen spinach. Also, use a light coating of oil and bake the quesadillas in a fully preheated oven.
Q8: What can I serve with these quesadillas?
Salsa, guacamole, sour cream, Greek yogurt, fresh tomato salad, cucumber salad, or vegetable soup are all excellent choices.
Q9: Can I use corn tortillas?
Yes, but corn tortillas are often smaller and less flexible than flour tortillas. Warm them first to make folding easier, and consider making smaller quesadillas with two tortillas rather than folding one.
Q10: Are these quesadillas gluten-free?
Not when made with standard flour tortillas. To make them gluten-free, choose certified gluten-free tortillas and check that all other ingredients are suitable for your dietary needs.
Q11: Can I make them in an air fryer?
Yes. Assemble the quesadillas and air-fry them at approximately 375°F (190°C) for 5–8 minutes, flipping halfway through. Cooking times vary by appliance, so check regularly and secure the tortillas if needed to prevent them from lifting.
Q12: How can I increase the protein content?
Add cooked chicken, black beans, or seasoned tofu, or serve the quesadillas with plain Greek yogurt. Keep in mind that extra ingredients will change the nutrition information.
Final Thoughts
These Baked Spinach Mushroom Quesadillas are proof that a simple combination of everyday ingredients can create something wonderfully comforting. The earthy mushrooms, tender spinach, fragrant garlic, and gooey cheese come together inside golden, crispy tortillas for a meal that is easy enough for busy weekdays and delicious enough to serve to guests.
Prepare a batch for lunch, serve them for a relaxed family dinner, or cut them into wedges for a party appetizer. With simple ingredients, flexible variations, and easy oven preparation, this recipe is one you will want to make again and again.