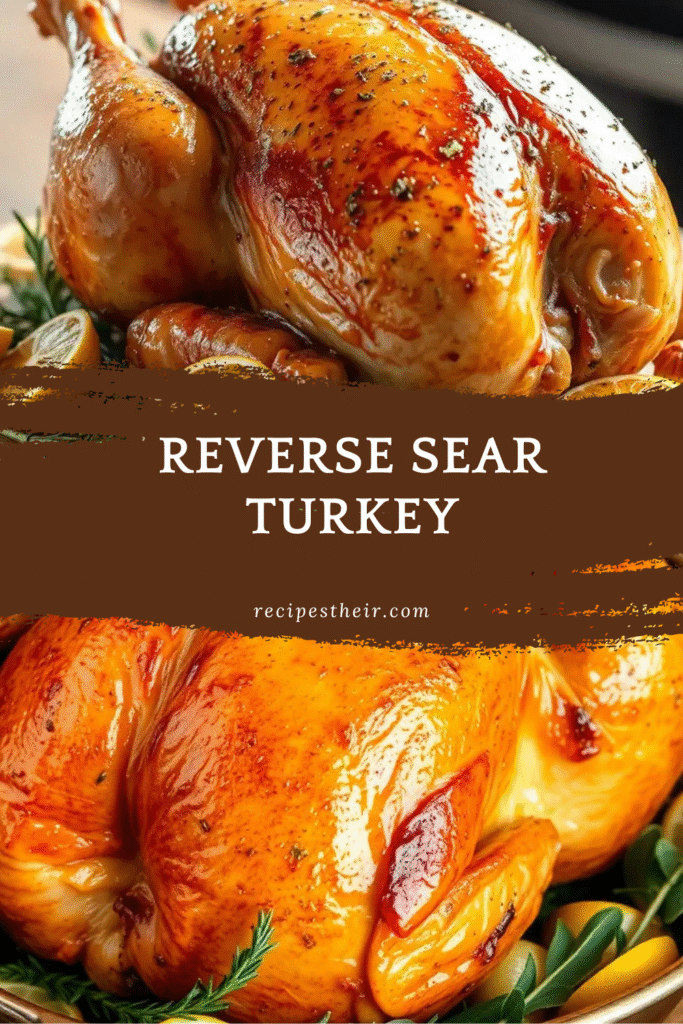
When it comes to preparing turkey, whether for Thanksgiving, Christmas, or a special family dinner, the biggest challenge is getting it perfectly cooked—moist on the inside with a golden-brown, crispy skin on the outside. Too often, traditional methods result in a dry bird or uneven cooking. That’s where the reverse sear turkey method comes in. This modern cooking technique guarantees juicy meat and crispy skin every single time.
In this article, we’ll walk you through everything you need to know about reverse searing turkey, from what it is, why it works, how to prepare it step-by-step, cooking tips, variations, and even side dish ideas. By the end, you’ll have all the tools to impress your guests with the best turkey they’ve ever had.
What Is Reverse Sear Turkey?
Reverse searing is a two-step cooking method that flips the traditional process upside down. Instead of starting with a high-temperature blast to sear the meat, you begin cooking the turkey low and slow, either in the oven or smoker, until it reaches almost the perfect doneness. Then, you finish it with a high-heat sear to crisp up the skin and lock in flavor.
For turkey, this method ensures:
- Even cooking from breast to thigh.
- Juicy meat that doesn’t dry out.
- Crispy, golden skin that looks picture-perfect on the table.
It’s the same technique many chefs use for steaks and roasts, adapted here for a large bird.
Why Choose Reverse Sear for Turkey?
If you’ve ever struggled with turkey coming out dry or overcooked, you’ll appreciate the advantages of reverse searing.
- Perfectly Cooked Meat Every Time
The breast and thighs cook more evenly, preventing the dreaded dry breast meat while waiting for the legs to finish. - Enhanced Flavor
Cooking low and slow allows seasoning and herbs to infuse deeply into the meat. - Crispier Skin
The final blast of heat crisps the skin beautifully without overcooking the inside. - Stress-Free Timing
Because most of the cooking happens at a low temperature, there’s a bigger window of doneness. You’re less likely to miss the mark.
Ingredients for Reverse Sear Turkey
Here’s what you’ll need to prepare a 10–14 lb turkey using the reverse sear method.
Main Ingredients:
- 1 whole turkey (10–14 lbs), thawed
- 4 tablespoons olive oil or melted butter
- 2 teaspoons kosher salt
- 1 teaspoon freshly ground black pepper
- 1 teaspoon garlic powder
- 1 teaspoon onion powder
- 1 teaspoon smoked paprika (optional, for color)
- 1 teaspoon dried thyme or rosemary
- Fresh herbs (sage, rosemary, thyme) for cavity
- 1 lemon, halved
- 1 onion, quartered
For Basting/Finishing:
- 2 tablespoons melted butter
- Fresh chopped parsley for garnish
Equipment Needed
- Roasting pan with rack OR baking sheet with wire rack
- Meat thermometer (instant-read is best)
- Oven or smoker capable of both low and high heat
Step-by-Step Instructions – How to Reverse Sear Turkey
1. Prep the Turkey
- Remove giblets and neck from the cavity.
- Pat the turkey dry thoroughly with paper towels—this is essential for crispy skin.
- Rub the bird all over with olive oil or butter.
- Season generously with salt, pepper, garlic powder, onion powder, and paprika.
- Stuff the cavity with lemon halves, onion, and herbs for extra flavor.
2. Cook Low and Slow
- Preheat oven to 250°F (120°C).
- Place turkey breast-side up on a roasting rack.
- Cook slowly until the internal temperature reaches:
- 155°F for breast
- 165°F for thighs
- This usually takes 3–4 hours for a 12-pound turkey but depends on size.
3. Rest Before Searing
- Remove the turkey from the oven and tent loosely with foil.
- Let it rest for 20–30 minutes—this allows juices to redistribute and prevents overcooking during the sear.
4. High-Heat Sear for Crispy Skin
- Increase oven temperature to 475°F (245°C) or heat your grill to high.
- Return turkey to the oven/grill for 15–20 minutes, until skin is golden brown and crisp.
5. Final Rest and Carve
- Remove turkey and rest again for 15 minutes before carving.
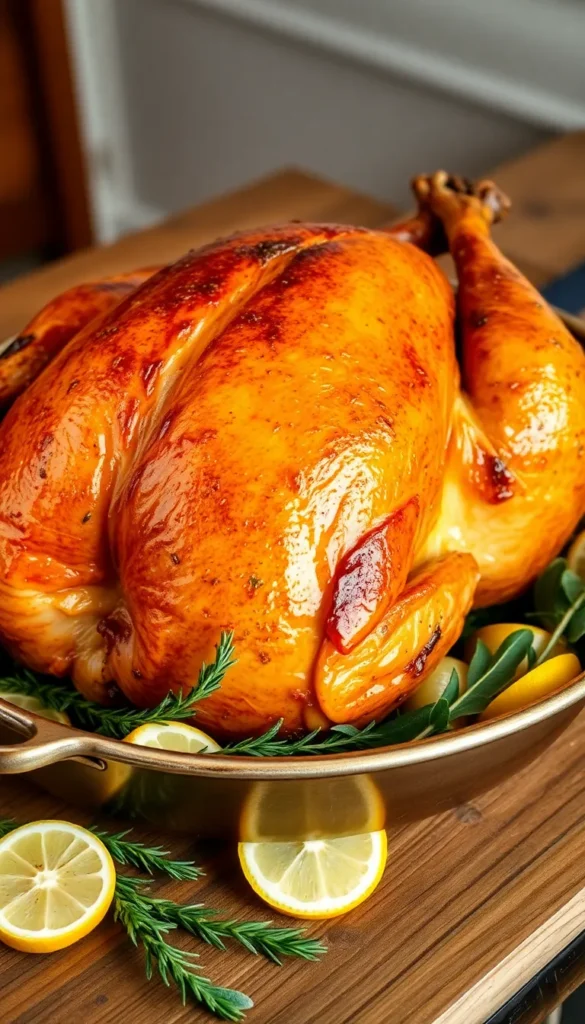
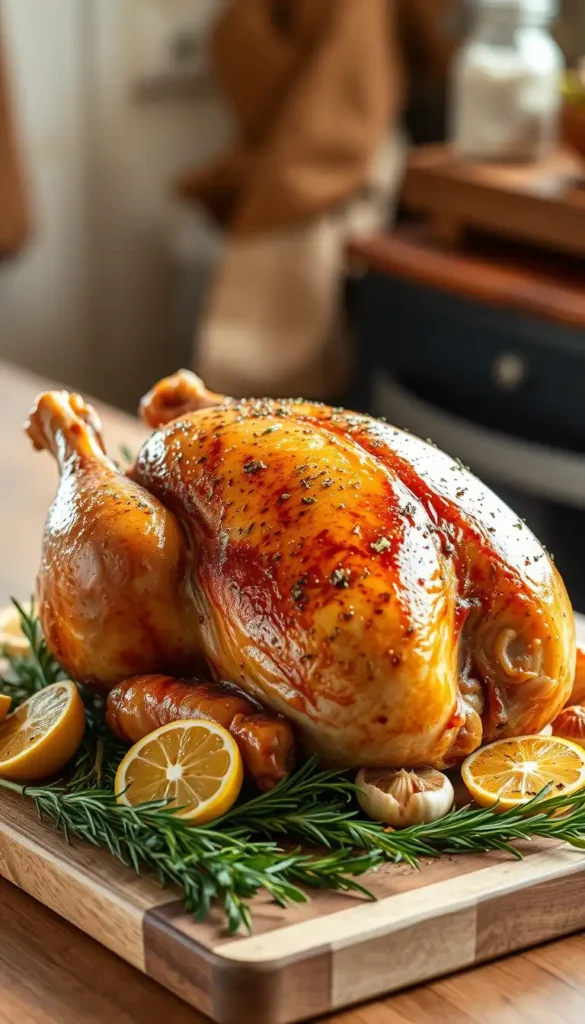
- Brush with melted butter and sprinkle with parsley for presentation.
Reverse Sear Turkey Cooking Time Chart
Here’s a helpful guide for planning:
| Turkey Weight | Low & Slow Cooking Time (250°F) | Final Sear (475°F) |
|---|---|---|
| 10 lbs | 2.5–3 hours | 15–20 minutes |
| 12 lbs | 3–3.5 hours | 15–20 minutes |
| 14 lbs | 3.5–4 hours | 20 minutes |
| 16 lbs | 4–4.5 hours | 20 minutes |
Always rely on temperature, not just time, for accuracy.
Pro Tips for the Best Reverse Sear Turkey
- Use a thermometer: This is non-negotiable for perfect doneness.
- Dry the skin overnight: Leave the turkey uncovered in the fridge for 12–24 hours after seasoning to ensure maximum crispiness.
- Try compound butter: Mix softened butter with garlic and herbs, then spread under the skin for extra flavor.
- Don’t skip the resting step: Resting before and after searing locks in juices.
Flavor Variations for Reverse Sear Turkey
- Garlic Herb: Rub with garlic butter and stuff with fresh rosemary and thyme.
- Cajun Style: Use a Cajun spice rub for bold, smoky flavor.
- Citrus Turkey: Add orange and lemon slices inside the cavity with zest in the butter rub.
- Smoked Reverse Sear Turkey: Use a pellet grill or smoker for the first stage, then finish with a high-heat sear in the oven or grill.
What to Serve with Reverse Sear Turkey
Pair your juicy, crispy-skinned turkey with classic sides like:
- Mashed potatoes with gravy
- Roasted Brussels sprouts with balsamic glaze
- Homemade stuffing
- Cranberry sauce
- Sweet potato casserole
- Fresh dinner rolls
Common Questions About Reverse Sear Turkey
1. Can I reverse sear a turkey breast instead of a whole bird?
Yes! The technique works beautifully on turkey breasts. Cook low and slow until it reaches 155°F, then sear for crisp skin.
2. Should I brine the turkey before reverse searing?
Brining is optional but highly recommended. A wet or dry brine helps lock in even more moisture.
3. Can I reverse sear turkey on a grill?
Absolutely. Start on the indirect heat side of the grill for low and slow cooking, then sear directly over high heat.
4. How do I keep the turkey skin from burning during the sear?
Watch carefully during the final sear, and if needed, rotate the pan for even browning.
Why Reverse Sear Turkey Is Worth Trying
Cooking a turkey can be intimidating, but the reverse sear method takes away the guesswork. Instead of worrying about dry breast meat or rubbery skin, you’ll end up with a turkey that’s juicy, flavorful, and visually stunning. The slow cooking stage allows for tender, evenly cooked meat, while the high-heat finish guarantees that beautiful crispy skin we all love.
Whether it’s your first time cooking a turkey or you’re a seasoned holiday chef, this method is a game-changer. Once you try reverse sear turkey, you may never go back to the traditional roasting method again.
Final Thoughts
If you want to elevate your holiday feast or family dinner, reverse searing a turkey is the ultimate technique. It’s straightforward, reliable, and results in the juiciest turkey with the crispiest skin. With just a little planning, a meat thermometer, and some patience, you can master this method and impress everyone at the table.
So this year, skip the stress of overcooking and embrace the reverse sear turkey—your guests will thank you.