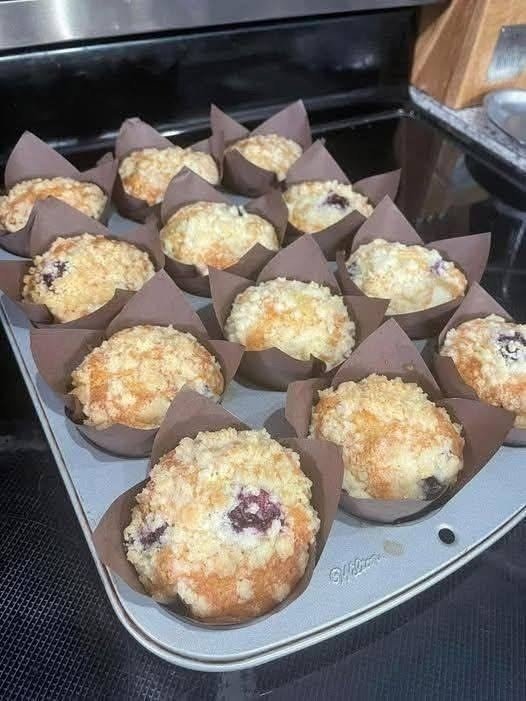
Creamy Chocolate Mousse – Rich, Light, and Irresistibly Chocolatey 🍫
This incredible Chocolate Mousse is rich, silky, creamy, and full of delicious chocolate flavor! 🍫😍 If you’re craving a chocolate dessert that feels luxurious without requiring complicated baking, this easy recipe is just what you need.
Each spoonful has a smooth, airy texture that melts in your mouth. It’s perfect for chocolate lovers, dinner parties, special occasions, or whenever you want something sweet and satisfying.
Recipe Details
– Prep Time: 15 minutes
– Chilling Time: 2–3 hours
– Total Time: Approximately 2 hours 15 minutes to 3 hours 15 minutes
– Servings: 4
– Course: Dessert
– Difficulty: Easy
– Cooking Method: No-bake
Ingredients
– 4 oz (115 g) dark chocolate, finely chopped
– 1 cup (240 ml) cold heavy whipping cream, divided
– 2 tablespoons powdered sugar, or to taste
– 1 teaspoon vanilla extract
– A small pinch of salt
– 1 tablespoon unsweetened cocoa powder, optional
– Dark chocolate shavings, for garnish
Choose good-quality chocolate for the best flavor. Chocolate containing around 60–70% cocoa provides a rich taste without making the mousse excessively sweet.
Instructions
Step 1: Melt the Chocolate
Place the chopped dark chocolate in a heatproof bowl. Melt it gently using a microwave in 15–20-second intervals, stirring between each interval, or set the bowl over a saucepan of gently simmering water.
Stir until the chocolate is completely smooth. Avoid allowing water or steam to enter the bowl, as this can affect the texture.
Set the melted chocolate aside and allow it to cool until lukewarm. It should remain fluid but must not be hot when combined with the whipped cream.
Step 2: Whip the Cream
Pour about ¾ cup of the cold heavy whipping cream into a chilled mixing bowl.
Using a hand mixer or stand mixer, whip until soft peaks begin to form. Add the powdered sugar, vanilla extract, and pinch of salt.
Continue whipping until medium peaks form. The cream should hold its shape while remaining smooth and soft.
Avoid overwhipping, as grainy cream can make the mousse less silky.
Keep the remaining ¼ cup of cream for the next step.
Step 3: Prepare the Chocolate Mixture
Gently warm the reserved ¼ cup of cream until steaming but not boiling.
Pour it over the melted chocolate and stir until smooth and glossy. Let the mixture cool until lukewarm.
This step helps create a smooth chocolate base that blends more easily with the whipped cream.
Step 4: Combine the Chocolate and Cream
Add about one-third of the whipped cream to the chocolate mixture. Stir gently to lighten the chocolate.
Add the remaining whipped cream in two batches, folding with a spatula using slow, gentle movements.
Continue folding until no large white streaks remain. Be careful not to stir aggressively, as preserving the air in the whipped cream gives the mousse its light texture.
Step 5: Portion the Mousse
Spoon the mixture into four small dessert glasses, ramekins, or serving bowls.
Smooth the tops with the back of a spoon if desired.
For an elegant presentation, use a piping bag to fill the glasses and finish with a few chocolate shavings.
Step 6: Chill Until Set
Cover the glasses and refrigerate for at least 2–3 hours, or until the mousse is chilled and softly set.
For a firmer texture, refrigerate a little longer.
Step 7: Garnish and Serve
Just before serving, sprinkle with dark chocolate shavings or a light dusting of unsweetened cocoa powder.
You can also add a few fresh raspberries or sliced strawberries for a fruity contrast.
Serve chilled and enjoy every smooth, chocolatey spoonful! ❤️
Description
This Chocolate Mousse is a simple, elegant dessert made with dark chocolate and whipped cream. Its texture is light and airy, while the chocolate gives it a rich, satisfying flavor.
Unlike baked chocolate desserts, this mousse requires no oven. The preparation is straightforward, and most of the total time is spent chilling the mousse in the refrigerator.
It’s ideal for preparing ahead of guests, serving after dinner, or enjoying a small homemade treat when a chocolate craving strikes.
The recipe is naturally gluten-free when all ingredients are verified gluten-free, although it is not dairy-free or low-calorie in its traditional form.
Helpful Notes
– Use quality chocolate: The chocolate is the main flavor, so choose one you enjoy eating on its own.
– Cool the chocolate first: Hot chocolate can melt the whipped cream and make the mousse runny.
– Keep the cream cold: Cold cream whips more effectively and helps the mousse set.
– Fold gently: Gentle folding keeps the mixture airy.
– Allow enough chilling time: The mousse needs time to develop its final texture.
– Adjust sweetness: Start with 1 tablespoon of powdered sugar if using sweeter chocolate, then add more to taste.
– Serve in small portions: The dessert is rich, so individual glasses make attractive and practical servings.
Expert Tips for Perfect Chocolate Mousse
1. Avoid overheating the chocolate. Melt it slowly and stir often for a smooth consistency.
2. Watch the whipped cream carefully. Stop whipping when it reaches medium peaks. Overwhipped cream can create a heavy or grainy texture.
3. Match the temperatures. The melted chocolate should be lukewarm before folding in the cream. If it’s too hot, the mousse may lose volume; if it becomes too cold and firm, it may form chocolate flecks.
4. Use a spatula rather than a whisk. Once the cream is whipped, fold gently to preserve its airy structure.
5. Make it ahead. Prepare the mousse several hours before serving so it has plenty of time to chill.
6. Add a flavor twist. A small amount of espresso powder enhances the chocolate flavor, while orange zest adds a fresh citrus note.
7. Keep toppings simple. Chocolate curls, a few berries, or a light cocoa dusting add visual appeal without overwhelming the mousse.
Serving Suggestions
Try serving this mousse with:
– Fresh strawberries or raspberries
– A few slices of banana
– Dark chocolate curls
– A light dusting of cocoa powder
– A small spoonful of Greek yogurt on the side
– A cup of coffee or unsweetened tea
For smaller portions, divide the mousse into six glasses instead of four. This can be a useful option when serving a rich dessert after a full meal.
Storage Instructions
Refrigerator: Store the mousse covered in the refrigerator and enjoy within 2–3 days for the best texture and quality.
Freezing: The mousse can be frozen in individual containers, although freezing and thawing may change its texture. If frozen, thaw in the refrigerator and stir gently if needed.
Food safety: Keep the mousse refrigerated and avoid leaving it at room temperature for more than 2 hours. This recipe uses no raw eggs, making it simpler to prepare than traditional egg-based mousse.
Nutritional Information
Approximate values per serving, based on four servings. Actual nutrition depends on the chocolate brand and cream used.
Nutrient Approximate Amount
Calories 350–420
Protein 4–6 g
Carbohydrates 18–25 g
Fat 28–35 g
Saturated Fat 17–22 g
Sugar 14–20 g
Fiber 2–4 g
These values are estimates, not laboratory measurements. Using smaller portions or a suitable lighter recipe can reduce calories, but substitutions may change the mousse’s texture.
Benefits of Homemade Chocolate Mousse
1. Helps satisfy a chocolate craving: A small serving can be an enjoyable way to include dessert in a balanced eating pattern.
2. Offers portion flexibility: Individual glasses make it easy to decide how much to serve.
3. Contains cocoa compounds: Dark chocolate contains cocoa flavanols, although the amount varies by chocolate type and processing.
4. Can be prepared ahead: Making dessert in advance can simplify entertaining and meal planning.
5. Allows ingredient control: Homemade mousse lets you choose the chocolate, sweetness, and portion size.
A note about weight loss: Losing 8 pounds in one week is a substantial change and may reflect water loss as well as other factors. It is not a typical or recommended ongoing rate of weight loss for most people. Chocolate mousse itself does not cause weight loss, but a thoughtfully portioned dessert can fit into a balanced diet.
Frequently Asked Questions
Q1: Can I make chocolate mousse without a mixer?
Yes. A hand whisk works, but whipping the cream will take longer and require more effort. Stop when the cream forms medium peaks.
Q2: Can I use milk chocolate instead of dark chocolate?
Yes. Milk chocolate makes the mousse sweeter and milder. You may want to reduce the powdered sugar.
Q3: Why is my mousse runny?
The chocolate may have been too warm, the cream may not have been whipped enough, or the mousse may need more chilling time. Refrigerate it longer before serving.
Q4: Can I make this dessert ahead of time?
Absolutely. Prepare it the day before serving and keep it covered in the refrigerator.
Q5: Is this chocolate mousse keto-friendly?
The traditional recipe is not necessarily keto-friendly because chocolate and cream contribute carbohydrates. A modified version using suitable low-carb chocolate and sweetener may reduce carbohydrates, but check the nutritional labels.
Q6: Can I make it dairy-free?
You can experiment with dairy-free whipping cream and dairy-free chocolate formulated for desserts. The texture may differ from the original recipe.
Q7: How can I make the mousse less sweet?
Choose dark chocolate with a higher cocoa percentage and reduce or omit the powdered sugar.
Q8: Can I add coffee flavor?
Yes. Add a small pinch of espresso powder to the melted chocolate for a deeper chocolate flavor.
Q9: How many servings does this recipe make?
This recipe makes four generous servings. You can divide it into six smaller portions for a lighter dessert.
Q10: Can chocolate mousse be part of a weight-management plan?
Yes, if it fits your overall eating pattern and portion preferences. No individual dessert causes weight loss on its own; long-term weight management depends on several factors, including overall food intake, activity, sleep, and health.
Final Thoughts
This Creamy Chocolate Mousse is rich, smooth, and wonderfully easy to prepare. With just a few ingredients and some chilling time, you can create a beautiful chocolate dessert that feels special without complicated techniques.