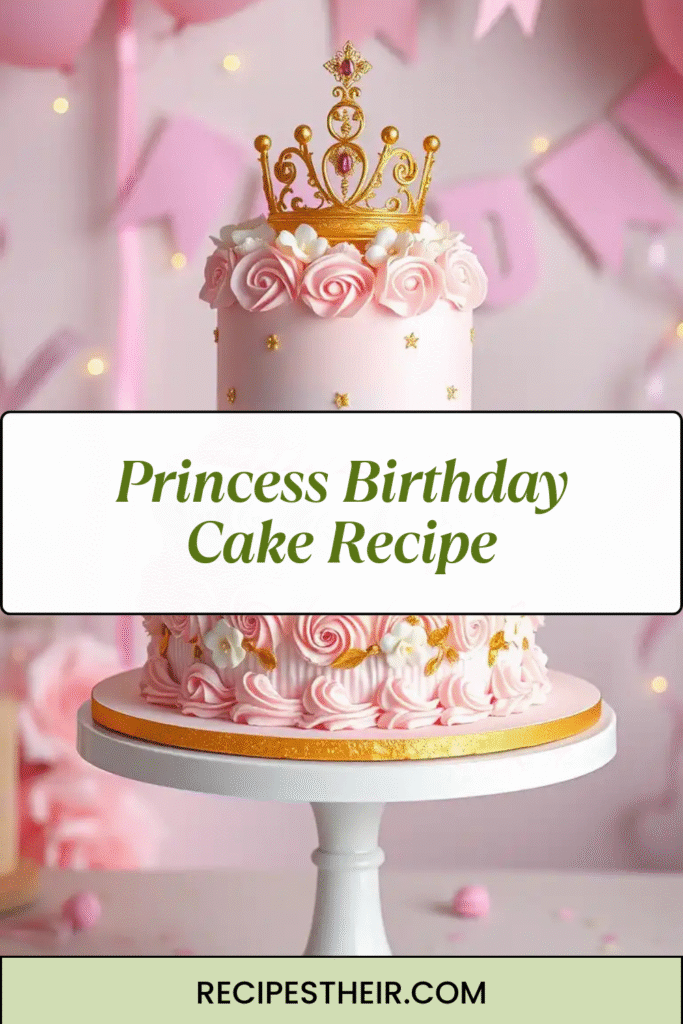
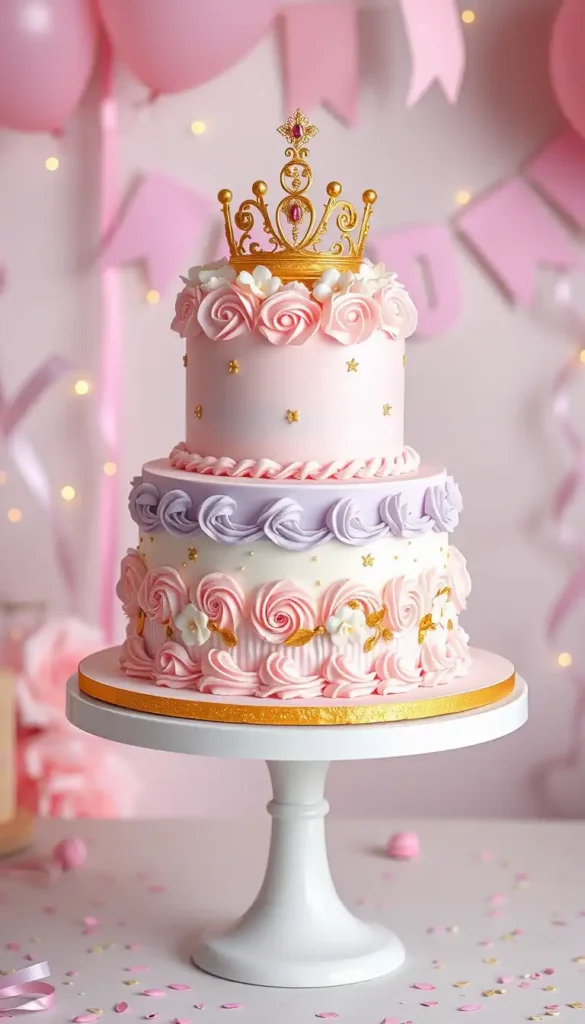
Every little princess deserves a royal celebration, and nothing completes a magical birthday quite like a Princess Birthday Cake. From the sparkly decorations to the soft, moist layers of cake and dreamy frosting, this cake is every child’s fairytale dream come true.
Whether you’re throwing a Disney princess-themed party or simply want to surprise your little one with something enchanting, this princess birthday cake recipe will make the day unforgettable. It’s easier than you think—and I’ll guide you through every step to create a show-stopping masterpiece worthy of a royal ball!
🎀 Why You’ll Love This Princess Birthday Cake
There are a few reasons this cake will make your celebration absolutely magical:
✨ Beautiful presentation: Layers of pastel-colored cake and frosting create a dreamy, fairytale look.
✨ Customizable: You can decorate it with your child’s favorite princess theme—Elsa, Ariel, Cinderella, or Rapunzel!
✨ Delicious flavor: Moist vanilla cake layers with creamy buttercream frosting that tastes as good as it looks.
✨ Easy to make: With a few baking tools and some creativity, even beginner bakers can create a princess-worthy cake.
🎂 Ingredients for the Princess Birthday Cake
Here’s everything you’ll need to make a 3-layer princess birthday cake that serves 10–12 people.
For the Cake Layers:
- 2 ½ cups all-purpose flour
- 2 ½ tsp baking powder
- ½ tsp baking soda
- ½ tsp salt
- 1 cup unsalted butter, softened
- 1 ¾ cups granulated sugar
- 4 large eggs, room temperature
- 1 tbsp vanilla extract
- 1 cup whole milk
- ½ cup sour cream (adds extra moisture)
- Pink, purple, and white gel food coloring
For the Buttercream Frosting:
- 1 ½ cups unsalted butter, softened
- 5 cups powdered sugar
- 2–3 tbsp heavy cream or milk
- 2 tsp vanilla extract
- Pink and lavender food coloring
Optional Decorations:
- Edible glitter or gold dust
- Sugar pearls
- Princess cake toppers (crowns, castles, tiaras)
- Fondant flowers
- White chocolate shards or drips
🧁 Step-by-Step Instructions
Follow these easy steps to make your princess birthday cake perfect every time.
Step 1: Preheat and Prepare
Preheat your oven to 350°F (175°C). Grease and line three 8-inch round cake pans with parchment paper. This will help your cakes release easily and bake evenly.
Step 2: Mix the Dry Ingredients
In a medium bowl, whisk together:
- All-purpose flour
- Baking powder
- Baking soda
- Salt
Set this aside while you prepare the wet ingredients.
Step 3: Cream the Butter and Sugar
In a large mixing bowl, use an electric mixer to cream butter and sugar together until light and fluffy (about 3–4 minutes). This helps give your cake a soft and airy texture.
Step 4: Add Eggs and Vanilla
Beat in the eggs, one at a time, followed by vanilla extract. Make sure each egg is fully incorporated before adding the next.
Step 5: Combine Wet and Dry Ingredients
Gradually add the dry ingredients to the butter mixture, alternating with milk and sour cream. Mix until just combined. Avoid overmixing—it can make the cake dense.
Step 6: Add Princess Colors
Divide the batter evenly into three bowls. Tint each with a different color:
- One light pink,
- One lavender or light purple,
- One white or pale cream.
Use gel food coloring for vibrant hues without altering the consistency.
Step 7: Bake the Cake Layers
Pour each batter into a prepared pan and bake for 25–30 minutes, or until a toothpick inserted into the center comes out clean.
Let the cakes cool completely before assembling. You can even bake them the night before and store them wrapped in plastic wrap.
Step 8: Make the Buttercream Frosting
In a large bowl, beat butter until smooth and creamy. Gradually add powdered sugar, one cup at a time, mixing on low speed.
Add vanilla extract and heavy cream until the frosting reaches a smooth, spreadable consistency.
Divide into bowls and tint with princess shades (soft pink, lavender, or white).
Step 9: Assemble the Cake
- Place the first layer (lavender) on your cake stand. Spread a generous layer of frosting.
- Add the second layer (white), then more frosting.
- Add the third layer (pink) and frost the entire cake with a thin crumb coat. Chill for 30 minutes.
- Apply a final thick coat of frosting and smooth it out using a spatula.
Step 10: Decorate Like Royalty
Now for the fun part!
You can decorate your princess birthday cake any way you like:
- Add edible glitter for a touch of sparkle.
- Pipe swirls or rosettes with pink and purple frosting.
- Use fondant flowers, pearls, or princess toppers for the finishing touch.
- For a “frozen” look, dust with edible silver shimmer or add sugar snowflakes.
Let your imagination run wild—your princess cake should be as unique as your little one!
🪄 Tips for the Perfect Princess Birthday Cake
👑 Use gel colors: Liquid food coloring can water down your batter or frosting. Gel gives brighter results.
👑 Chill your layers: Cold cake layers are easier to frost and less likely to crumble.
👑 Smooth frosting easily: Use a bench scraper for smooth edges and a professional finish.
👑 Add height: Want a taller, grander cake? Bake four thin layers instead of three.
👑 Make ahead: You can bake the cakes a day early and frost them on the day of the party.
💖 Flavor Variations
Want to switch things up? Try these princess-inspired flavor twists:
🌸 Strawberry Princess Cake: Add strawberry puree and a touch of pink coloring for a fruity twist.
🌼 Lemon Princess Cake: Add lemon zest and juice for a zesty, sunshine flavor.
🫐 Blueberry Lavender Cake: Perfect for a Frozen or Elsa-themed birthday.
🍫 Chocolate Princess Cake: Swap ½ cup of flour for cocoa powder for a royal chocolate delight.
🎈 Princess Cake Theme Ideas
Looking for creative inspiration? Here are some fun princess birthday cake themes:
- Disney Princess Cake – Incorporate favorite characters like Ariel, Belle, or Rapunzel.
- Frozen Cake – Use blue and silver decorations with snowflake sprinkles.
- Pink Castle Cake – Shape your layers into a mini castle with sugar towers.
- Unicorn Princess Cake – Combine pastel swirls and a fondant unicorn horn.
- Royal Crown Cake – Top with an edible gold crown centerpiece.
Each of these ideas adds a personal touch to your celebration and makes your cake Instagram-worthy!
🎉 Serving and Storage
- Serving: Slice with a warm knife for clean cuts. Serve with vanilla ice cream or pink lemonade for a perfect party treat.
- Storage: Store leftovers covered at room temperature for up to 2 days or refrigerate for up to 5 days.
- Freezing: You can freeze unfrosted cake layers for up to 2 months—just thaw before frosting.
👑 Conclusion: A Magical Cake for a Magical Day
A Princess Birthday Cake isn’t just a dessert—it’s the centerpiece of a fairytale celebration. With soft, colorful layers and sparkling decorations, this cake will make any birthday girl feel like true royalty.
Whether you’re baking for your daughter, niece, or granddaughter, this recipe delivers a perfect balance of beauty, taste, and magic. So put on your apron, sprinkle some edible glitter, and let the royal baking begin!
Because every princess deserves a cake that’s just as enchanting as her dreams. 💫