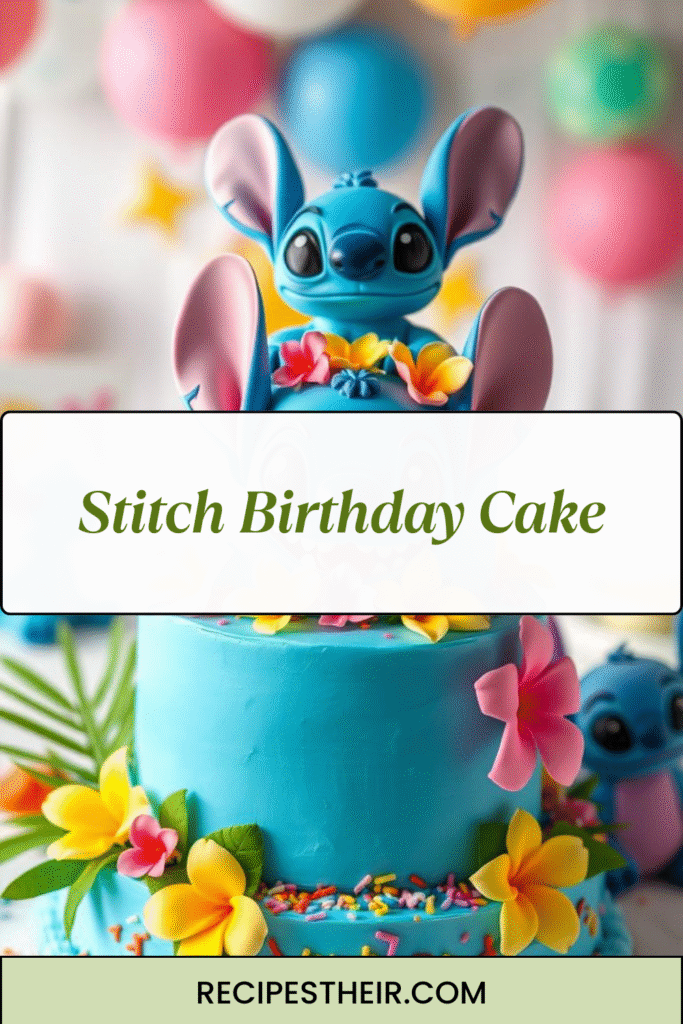
If you’re a fan of Disney’s Lilo & Stitch or planning a themed party, nothing will impress guests more than a Stitch Birthday Cake. This adorable blue alien has stolen hearts across generations — and now he can be the centerpiece of your dessert table. Whether you’re baking for a child, a Disney lover, or even yourself, this cake is fun, creative, and easier to make than it looks.
In this guide, we’ll show you step-by-step how to make a Stitch-themed birthday cake from scratch, including baking tips, decorating ideas, and creative shortcuts. Let’s dive into the galaxy of flavor and fun!
Why Choose a Stitch Birthday Cake?
There are so many reasons why a Stitch-themed cake is a hit:
- Perfect for all ages: Kids adore Stitch for his mischief and cuteness, while adults love the nostalgic Disney vibes.
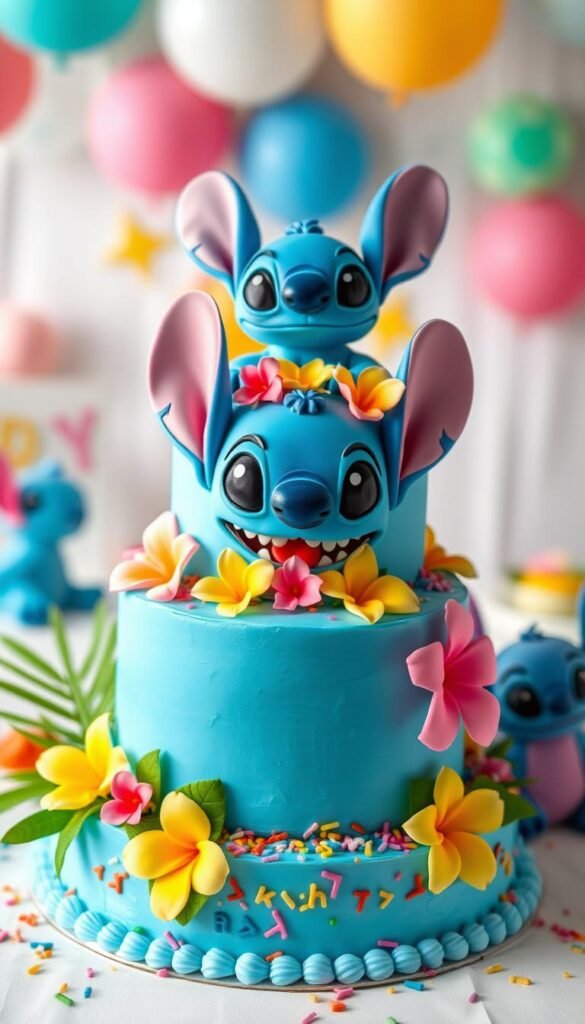
- Visually stunning: The blue and purple hues make this cake stand out beautifully on any dessert table.
- Customizable: You can make it a single-tier, two-tier, or even cupcakes — all with a Stitch twist.
- Fun to decorate: The combination of tropical island vibes and Stitch’s cute face makes it enjoyable for creative bakers.
Whether you’re a professional decorator or a home baker, this cake is a wonderful way to showcase creativity and joy.
Ingredients You’ll Need for Stitch Birthday Cake
Before you start baking, gather all your ingredients for both the cake and frosting.
You can use your favorite cake flavor — vanilla, chocolate, or even a tropical coconut cake fits the Stitch theme perfectly.
For the Cake (Two 8-inch Layers):
- 2 ½ cups all-purpose flour
- 2 ½ tsp baking powder
- ½ tsp baking soda
- ½ tsp salt
- ¾ cup unsalted butter, softened
- 1 ¾ cups granulated sugar
- 4 large eggs
- 1 cup buttermilk (or milk + 1 tsp lemon juice)
- 2 tsp vanilla extract
- Optional: a few drops of blue food coloring for a Stitch-inspired surprise inside
For the Frosting (Buttercream):
- 1 ½ cups unsalted butter (room temperature)
- 5 cups powdered sugar
- 2 tsp vanilla extract
- 2–4 tbsp heavy cream or milk
- Blue, purple, and black gel food coloring
- A small amount of pink food coloring for Stitch’s ears and nose details
Decorating Tools:
- Offset spatula
- Piping bags
- Round and star piping tips
- Small fondant tools (optional)
- Edible eyes or fondant to create Stitch’s face
- Stitch cake topper or edible image (optional but fun!)
How to Make the Stitch Birthday Cake
Step 1: Bake the Cake Layers
- Preheat your oven to 350°F (175°C). Grease and flour two 8-inch round cake pans or line them with parchment paper.
- In a medium bowl, whisk together flour, baking powder, baking soda, and salt.
- In a large bowl, beat the butter and sugar together until light and fluffy — about 3 minutes.
- Add eggs one at a time, mixing well after each addition. Then stir in the vanilla.
- Gradually mix in the dry ingredients, alternating with buttermilk. Start and end with flour.
- If you’re going for a blue-tinted cake, add a few drops of blue food coloring and gently fold until even.
- Divide the batter evenly between pans and bake for 25–30 minutes, or until a toothpick comes out clean.
- Let the cakes cool completely before frosting.
Step 2: Prepare the Buttercream Frosting
- In a large mixing bowl, beat butter on medium-high speed until creamy (about 2 minutes).
- Gradually add powdered sugar, one cup at a time, until fully incorporated.
- Add vanilla and 2 tablespoons of milk or cream; continue beating until smooth and fluffy.
- Divide frosting into separate bowls:
- One large portion for Stitch’s blue body
- Small portions for black (eyes, nose), purple (ears, details), and pink (inner ears)
If you prefer, you can also use whipped cream frosting or fondant for a smoother finish.
Step 3: Level, Fill, and Stack the Cake
- Use a serrated knife to level the tops of your cooled cake layers.
- Place one cake layer on a cake board or serving plate. Spread a generous layer of frosting (vanilla or blue) in between.
- Stack the second layer on top, making sure it’s even.
- Apply a thin crumb coat — a light layer of frosting that seals in crumbs — then chill for 15–20 minutes.
Step 4: Frost and Decorate
Now comes the fun part — turning your cake into Stitch!
- Apply the final layer of blue frosting evenly over the cake using an offset spatula. Smooth it out as best as possible.
- Use black frosting to pipe Stitch’s eyes and nose. If using fondant, roll small pieces into shape and stick them gently on the cake.
- Use purple and pink frosting for the ears, either piped on the sides or made separately with fondant and attached with skewers.
- Add a small smile using black frosting and white highlights for his cute, expressive eyes.
- Optional: Decorate around the base of the cake with tropical flowers, coconut flakes, or edible glitter for a Hawaiian touch.
Creative Variations of the Stitch Birthday Cake
Want to get creative? Here are a few fun variations to try:
1. Stitch Cupcakes
Make individual Stitch-themed cupcakes — perfect for parties! Frost each cupcake blue and decorate with mini fondant ears and eyes.
2. Lilo & Stitch Beach Cake
Add edible sand made from crushed graham crackers and decorate with fondant surfboards, palm trees, and seashells. It’s like Stitch at the beach!
3. Rainbow Stitch Cake
Add colorful layers inside the cake (pink, blue, purple) to surprise guests when you slice it. It looks magical and totally Disney-inspired.
4. Ice Cream Stitch Cake
For a summer birthday, turn this recipe into an ice cream cake with layers of vanilla cake and blue-tinted ice cream.
Tips for Perfect Results
- Use gel food coloring instead of liquid for vibrant colors without changing frosting consistency.
- Chill your cake between steps — it helps with cleaner frosting layers.
- Decorate on a turntable for smoother edges and an even finish.
- Practice piping on parchment paper before doing it on the cake.
- If you’re short on time, use a store-bought cake mix and focus your energy on the decorations — no one will notice!
Serving and Storing
- Keep your Stitch birthday cake in the refrigerator if it’s warm outside, but bring it to room temperature before serving for the best flavor and texture.
- Store leftovers in an airtight container for up to 3–4 days.
- If you’ve used fondant decorations, avoid humidity — it can make them sticky.
Stitch Cake Topper and Decoration Ideas
If you want to add the final magical touch, here are a few decoration ideas:
- 3D Stitch cake topper (made of fondant or plastic)
- Edible Stitch image printed on sugar paper
- Hawaiian flowers and leaves made of buttercream
- Mini surfboard or coconut theme around the cake
- Sparkling blue glitter dust to match Stitch’s personality
You can even create a galaxy background on the sides of the cake using blended shades of blue, purple, and black buttercream.
Frequently Asked Questions
Q1: Can I use fondant instead of buttercream?
Yes! Fondant gives a smoother, cartoon-like finish — perfect for Stitch’s cute face. Cover your cake in blue fondant and add details like his eyes, ears, and nose separately.
Q2: How do I make Stitch ears stand up?
Cut ears from fondant or modeling chocolate and insert toothpicks or skewers to support them. Let them dry overnight before attaching.
Q3: Can I make this cake in advance?
Absolutely. Bake the cake layers a day ahead and store them wrapped in plastic. Frost and decorate the next day for the freshest result.
Final Thoughts
A Stitch birthday cake is not just dessert — it’s a celebration of joy, creativity, and the magic of friendship (ohana means family!). Whether you’re hosting a tropical-themed birthday or surprising a Disney lover, this cake is guaranteed to be the showstopper of your party.
From its bright blue colors to Stitch’s mischievous grin, every slice brings a smile. So grab your whisk, a little imagination, and get ready to create a cake that’s as adorable as Stitch himself!