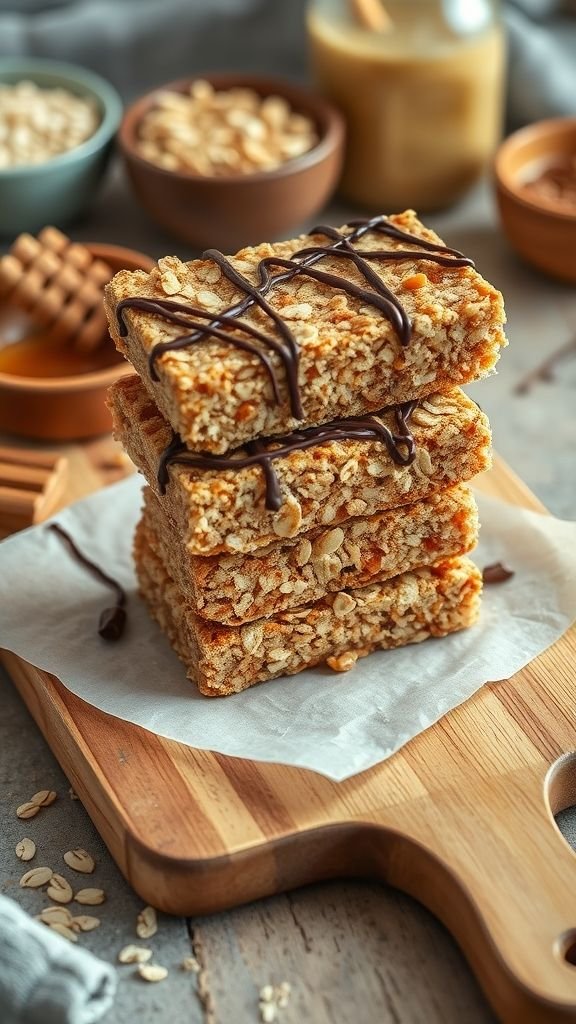
If you’re tired of overpriced, overly processed protein bars from the store, it’s time to take matters into your own hands. Homemade crunchy protein bars are not only healthier, but they also taste amazing and can be customized exactly to your liking. Whether you need a post-workout snack, a quick breakfast on the go, or a mid-afternoon pick-me-up, these bars are the perfect solution.
In this article, you’ll learn everything about making your own protein bars — from choosing the best ingredients to storing them for maximum freshness. Get ready to ditch the store-bought options and make a batch of protein-packed, crunchy goodness at home.

Why Make Homemade Crunchy Protein Bars?
Making protein bars at home comes with plenty of benefits:
- No unnecessary additives – Store-bought protein bars often contain preservatives, artificial flavors, and hidden sugars.
- Cost-effective – Buying protein bars regularly can get expensive. Making them at home saves money in the long run.
- Customizable – Choose your favorite flavors, level of sweetness, and crunchiness.
- Better nutrition – You control the ingredients, so you can boost fiber, healthy fats, and protein as much as you want.
Ingredients for Homemade Crunchy Protein Bars
Here’s what you’ll need to make a delicious batch of crunchy protein bars:
- 1 ½ cups rolled oats – The base of your bars for a chewy yet crunchy texture.
- 1 cup puffed rice cereal – Adds the satisfying crunch.
- ½ cup nut butter (peanut butter, almond butter, or cashew butter) – Helps bind the bars and adds healthy fats.
- ½ cup honey or maple syrup – Natural sweetener that holds everything together.
- 1 scoop protein powder (vanilla, chocolate, or unflavored) – Boosts the protein content.
- ¼ cup chopped nuts (almonds, peanuts, or cashews) – Adds extra crunch and nutrients.
- ¼ cup seeds (chia, flax, or pumpkin seeds) – Optional, for extra fiber and omega-3s.
- 1 tsp vanilla extract – Enhances flavor.
- Pinch of salt – Balances sweetness.
- Optional mix-ins – Dark chocolate chips, dried fruit, coconut flakes.
Step-by-Step Instructions
1. Prepare Your Pan
Line an 8×8-inch baking dish with parchment paper, leaving a little overhang so you can easily lift the bars out later.
2. Toast Your Oats and Nuts
For extra flavor and crunch, toast the oats and chopped nuts in a skillet over medium heat for 5–7 minutes, stirring frequently until golden and fragrant.
3. Melt Nut Butter and Sweetener
In a small saucepan over low heat, combine the nut butter and honey (or maple syrup). Stir until smooth and slightly warm. Remove from heat and mix in vanilla extract.
4. Combine Dry Ingredients
In a large bowl, mix together oats, puffed rice cereal, protein powder, chopped nuts, and seeds.
5. Add Wet Mixture
Pour the warm nut butter mixture over the dry ingredients. Stir well until everything is evenly coated. If adding chocolate chips, wait until the mixture cools slightly to prevent melting.
6. Press and Chill
Transfer the mixture to your prepared baking dish. Press down firmly with a spatula or the back of a spoon to compact the mixture. This step is key for crunchy bars that hold together.
Refrigerate for at least 1–2 hours, or until firm.
7. Slice and Store
Lift the mixture out of the pan using the parchment overhang. Cut into 10–12 bars. Store in an airtight container at room temperature for up to 5 days, or in the fridge for up to 2 weeks.
Flavor Variations
The beauty of homemade crunchy protein bars is that you can make them taste exactly how you want. Here are a few variations to try:
- Chocolate Peanut Butter Crunch – Use chocolate protein powder and drizzle melted dark chocolate on top.
- Berry Almond Crunch – Add dried cranberries or blueberries and almond slices.
- Coconut Cashew Delight – Mix in shredded coconut and use cashew butter.
- Mocha Energy Bars – Stir in 1 tsp espresso powder and use chocolate protein powder.
- Trail Mix Bars – Add a mix of raisins, sunflower seeds, and dark chocolate chips.
Tips for Perfect Crunchy Protein Bars
- Press firmly – Use the back of a measuring cup or spatula to really compact the mixture.
- Use runny nut butter – Thick nut butter can make mixing difficult. If needed, microwave for a few seconds to soften.
- Adjust sweetness – Taste the mixture before pressing into the pan. Add a little more honey or maple syrup if you prefer sweeter bars.
- Chill long enough – Give your bars enough time to firm up for clean slices.
Storage and Meal Prep
Homemade protein bars are perfect for meal prep because they store well. Here’s how to keep them fresh:
- Room Temperature: Store in an airtight container for up to 5 days.
- Refrigerator: Keeps fresh for up to 2 weeks.
- Freezer: Wrap individually and freeze for up to 3 months. Just thaw before eating.
Nutritional Benefits
Depending on the ingredients you choose, your homemade bars can pack:
- 12–15 grams of protein per bar
- Plenty of fiber from oats, seeds, and nuts
- Healthy fats from nut butter and seeds
- No refined sugars if you stick to natural sweeteners
This makes them an excellent snack for athletes, busy professionals, and kids who need a filling after-school bite.
Why These Bars Are Better Than Store-Bought
Most store-bought protein bars contain sugar alcohols, soy protein isolates, and preservatives that can upset digestion. With this recipe, you know exactly what’s going into your body. Plus, you get that satisfying crunch without sacrificing nutrition.
Final Thoughts
Making homemade crunchy protein bars is easier than you think, and the payoff is huge. You’ll save money, eat cleaner, and enjoy snacks that taste incredible. Experiment with different flavor combinations until you find your favorite, and keep a batch on hand for whenever hunger strikes.
Try this recipe today and see why homemade will always beat store-bought. Once you’ve made these once, they’ll become a staple in your weekly meal prep routine.